大江戸ジュリアナイト (Ohedo Julia-Night) Miku

Happy 10th Birthday Miku!

August 31st, 2017

31st of August 2007 brought you into our world, and since then you have continuously blessed us with your beautiful voice and gorgeous looks. I can’t believe that I have listened to 10 years of your songs, it feels like only yesterday I became aware of your existence and instantly fell in love. Since then I’ve bought numerous goods and CDs, and even came to see you live in Osaka in 2014.

Lets look back at all the amazing songs you’ve brought to us – the creators using Miku and other Vocaloids to entertain and empower fans all over the world!

And if you are curious to where the cover photo is from, its from a song I’m obsessed about right now, called 大江戸ジュリアナイト (Ohedo Julia-Night)

SMASH! 2017

August 25th, 2017

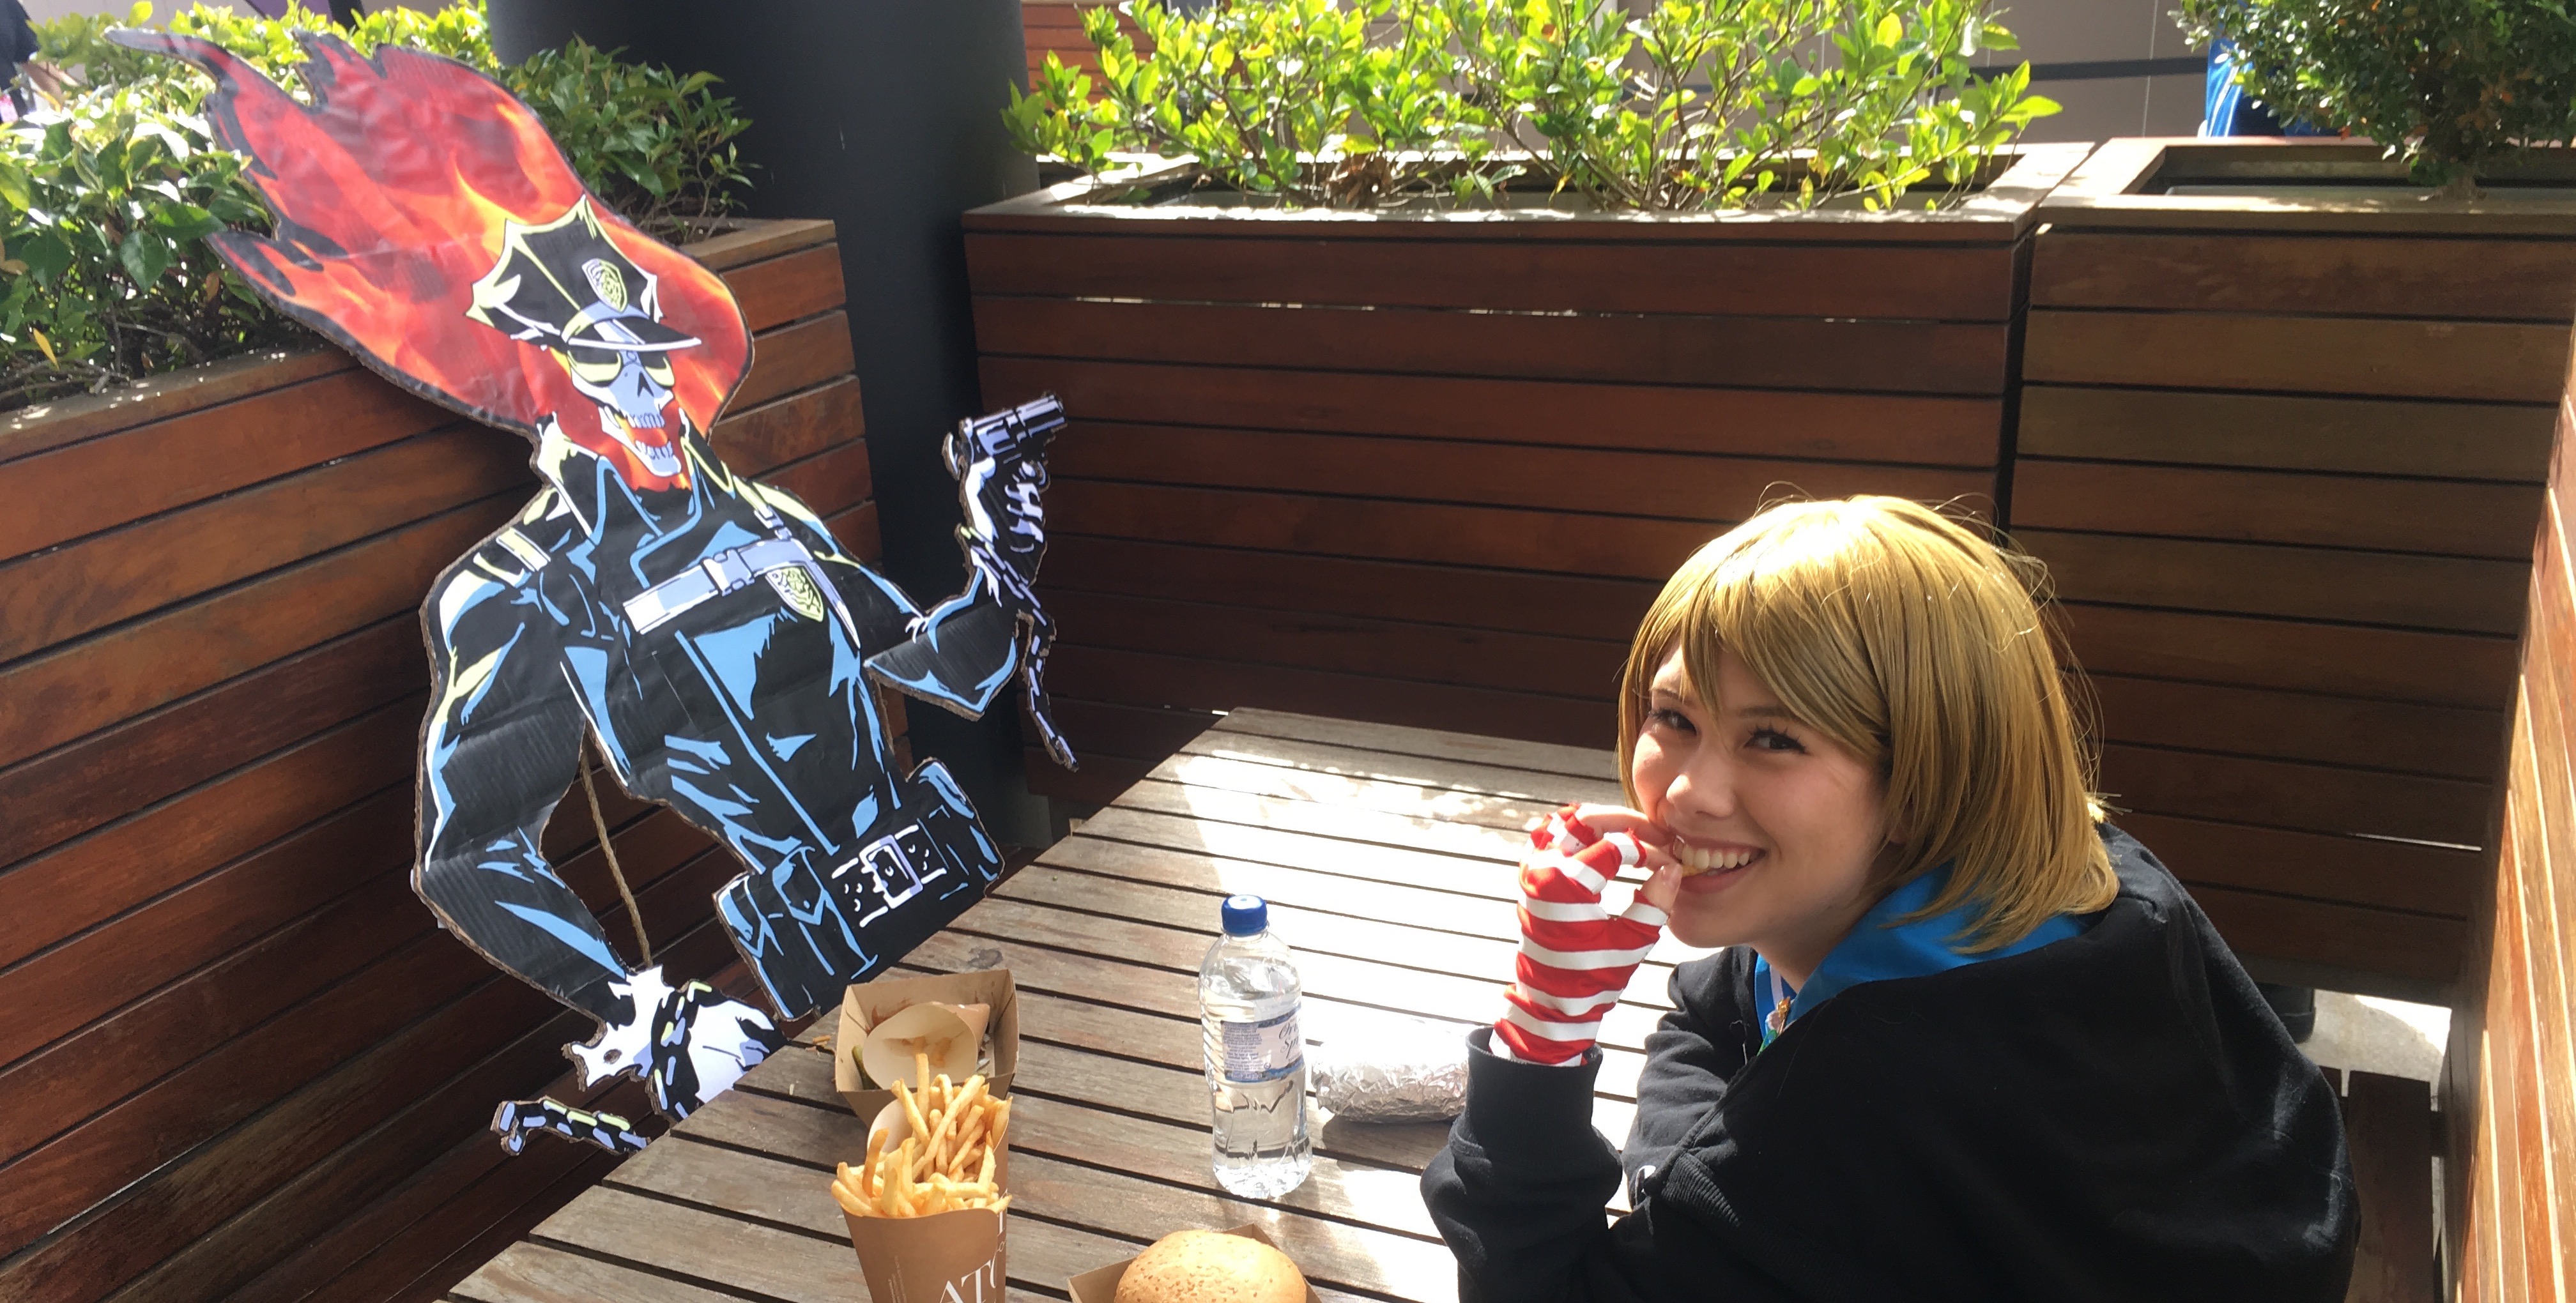
Every year I go to SMASH! and every year I cosplay. This year instead of the usual “dress up as the character you like”, I did something different. I actually brought the anime character into the real world! I brought Inferno Cop to life.

It is impossible to describe what Inferno Cop is about. Its just a lot of random stuff happening for no reason, but god is it amazing. Studio Trigger was responsible for this masterpiece, and they have announced Season 2 a few months ago at a US anime convention. So what better time to show off my love for Trigger and Inferno Cop than at SMASH.
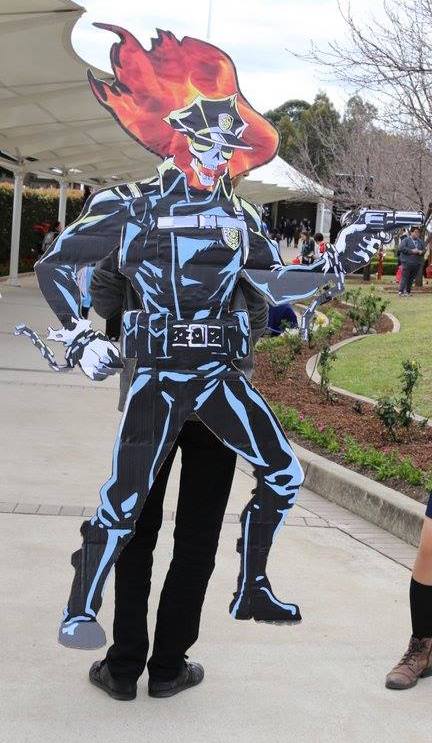
In order to understand why I did what I did, I have to explain that in the whole anime Inferno Cops limbs do not move. Thats right, he is not animated, when he moves its just a bounce, to turn around, they reflect the artwork. That is a low budget anime, and I made a low budget cosplay out of it.

It took me quite some time to make him. First I had to get a large enough image of him to print. As the anime isn’t even released in BluRay, that proved rather challenging. I had to take a screenshot and vector every element on it to make him look just like in the anime, but also be scalable to 2 meters. Then I printed 20 A3 sized pieces of paper, cut them all up, stuck them to a piece of cardboard (which I took from work), cut out the cardboard, attached handles and a rope, and finally was able to wear him on my back.
If I had to do all this by myself, I probably wouldn’t have finished in time, but thankfully I had my good friend Cody and my girlfriend (at the time) Leah help me out with a lot of the cutting and gluing.

This was a great cosplay idea, an I might reuse him when season 2 actually comes out, or just as a prop for something somewhere at an AnimeSydney event.

This is not the first time I’ve cosplayed and definitely not the last. You can see all my previous cosplays here.

 

u.x.

Introduction to User Experience Design

June 20th, 2017

User experience (UX) design is a relatively new field and only came around with the mass adoption of computers and digital technology. It has evolved over the years and is now an essential part of the digital product development cycle. The core mission of UX is to craft digital experiences that not only empower, but also delight users. In this digital era, innovation never stops and with it more and more opportunities for creating user experiences arise.

The question is how does one get into UX design. Is knowledge of coding essential? Or a degree in design? In reality it doesn’t matter, anyone with a keen eye for detail and a passion to make things better can be a UX designer.

But what is UX? UX is both the end result experience a product offers and a set of methods with which to craft experiences. These methods include various user research techniques, crafting user-flows, layout design, and user testing.

In this article I will give a brief overview of a few concepts that will help define the needs of the users, how to work with and adapt to constraints, what it means to create a story that shapes the experience, the innovation aspect of UX and that good UX comes from a lot of testing and being open to input.

Seeing Through the Users’ Eyes

The most important aspect of UX design is to learn that the ways users interact with a product and the experiences they have with it vary wildly depending on their backgrounds and life situations. In order to create a pleasing user experience considerations of the users age, background, physical location, interests, and of course comfort level with technology, need to be considered and designed around.

Read More

Perfection

May 25th, 2017

Perfection is achieved not when there is nothing more to add, but when there is nothing left to take away

Queenstown Sunrise

NZ Photography Trip – Day 9

April 24th, 2017

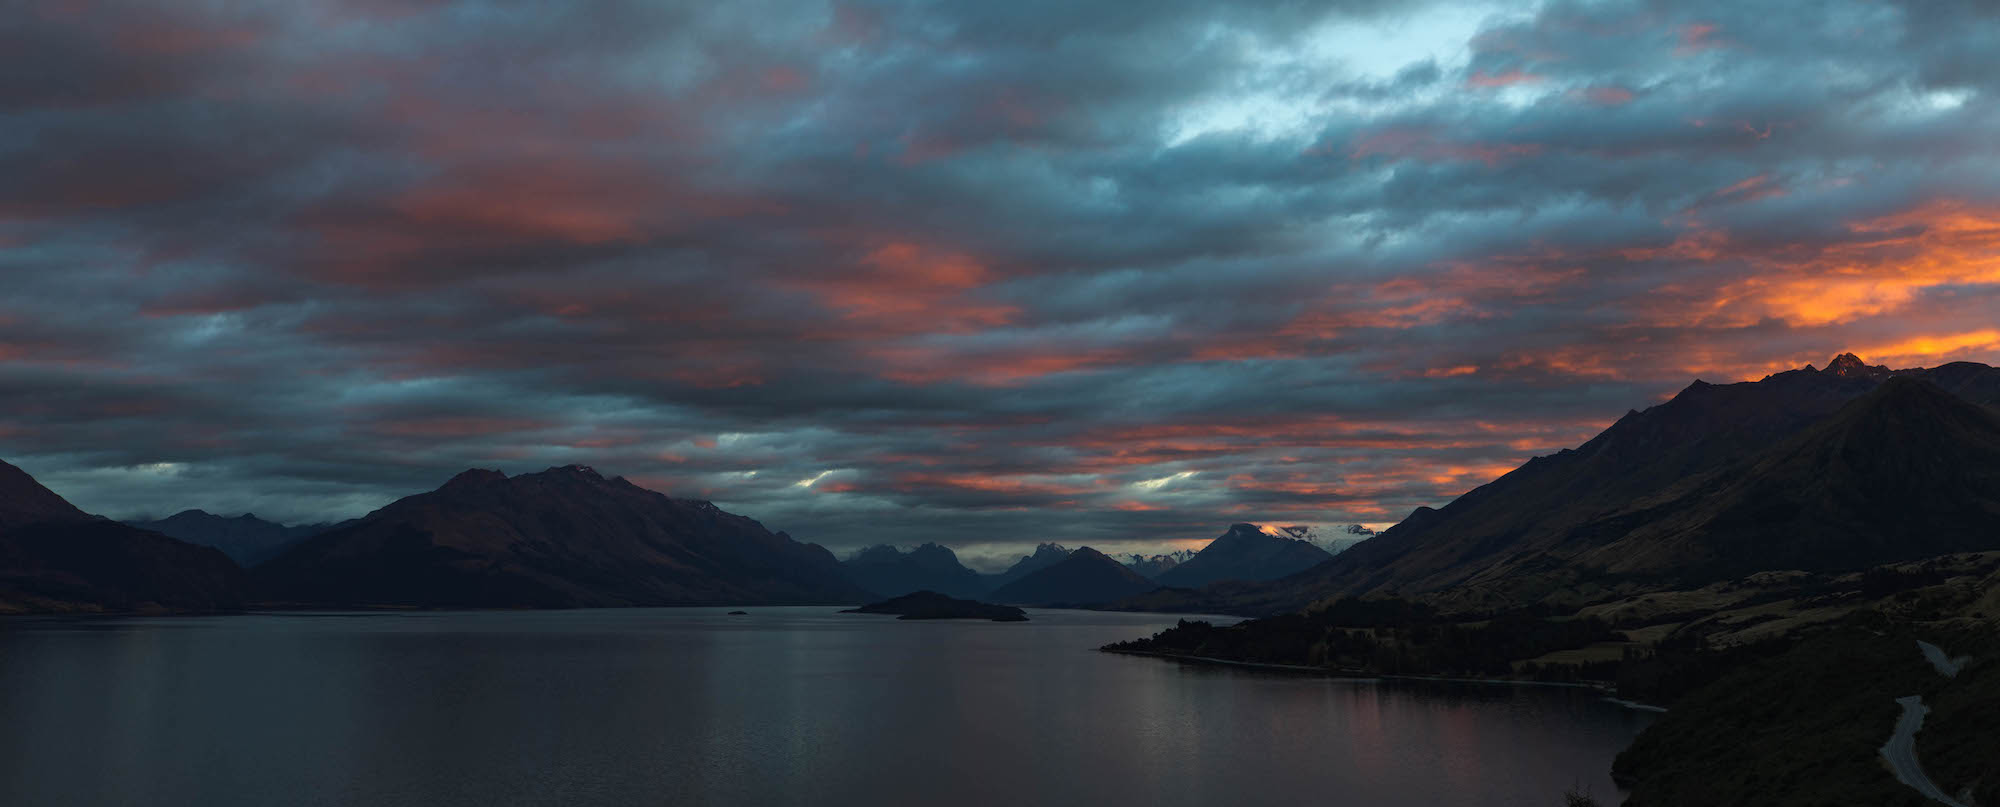
Well, looks like this is the end, its time to go home. My flight back to Sydney was at midday, so you know what that means? I can go for another sunrise!

I don’t even know where we went this time, we just drove alongside the coast of the lake for about 20 minutes and then reached this lookout point. From there we had a great view of the lake, and the valley. Today was actually the first time when we had proper clouds during a sunrise. Both Anton and I were really happy that we managed to get some bright red colours on the clouds and mountains. Even if it only lasted a few minutes.

That’s all folks. I am now heading back to Sydney and getting back into my old routine of work, club, and chilling with friends. Time to edit all the photos I took. (Edit: ended up with exactly 100 photos from this trip, down from 1.2k)

flickr

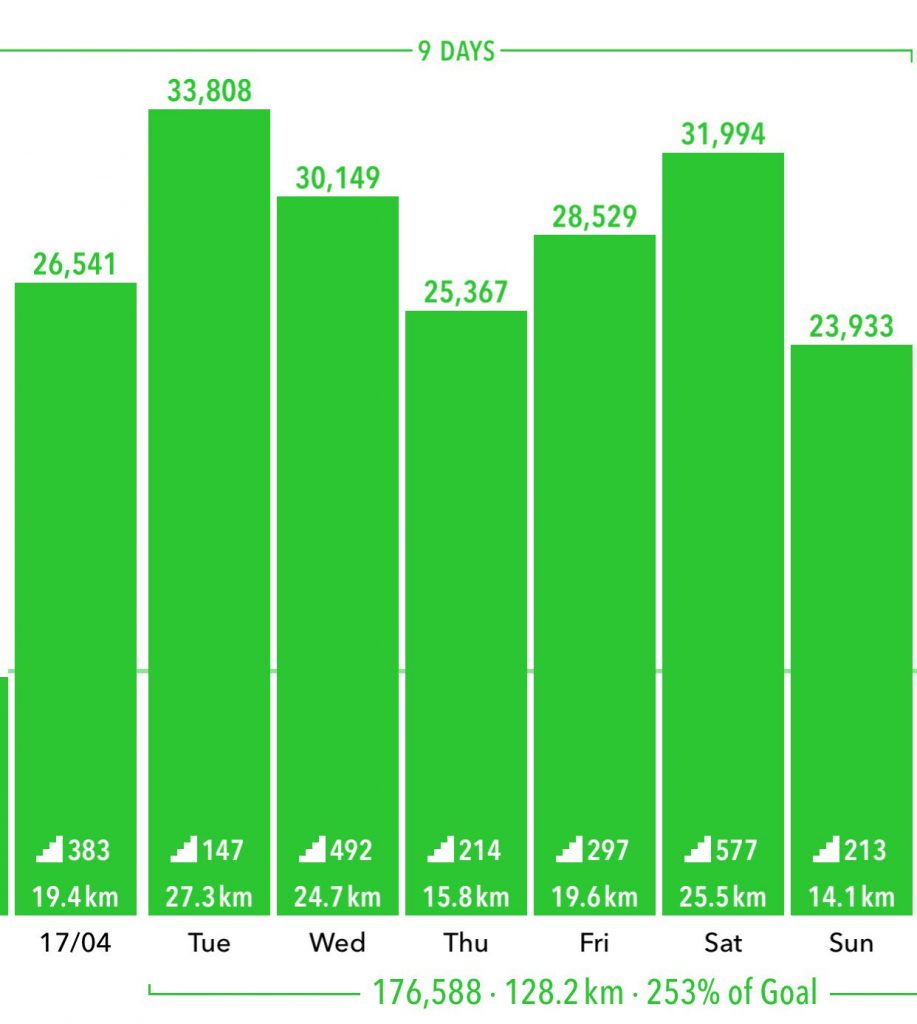
Look at how much I walked during the past week! I think I beat all my records.

Queenstown Hill

NZ Photography Trip – Day 8

April 23rd, 2017

After that really long hike up and down Mt. John, Anton and I were definitely not up for another hike, especially at 6am in the morning. So we went around the lake, looking for some decent photo spots. Took a few shots here and there, went back to the tree…

Not much to say about that morning, aside for the fact that we had to frantically pack up as we had a long trip to Queenstown next!

On the way to Queenstown, we stopped in the Arrowtown. Its a small old style town by the side of the mountains and near a river. I really liked the architecture and the autumn colours, and I wish I took some photos, but it was very crowded. It was right in the middle of their autumn festival, so there were tons of people – both tourists and locals from around the area. We had some delicious lamb steaks and then continued our journey to Queenstown.

Even though Queenstown sounds like a small city, it was the biggest one we visited while on our trip (excluding Christchurch). The original plan was to camp about 10km out of town, however after a week of sleeping in a tent in the cold I had enough. I booked us a twin bed room in a backpackers and I don’t regret it one bit. We could finally take a warm shower, lie in a soft bed and I can pack up for my return flight!

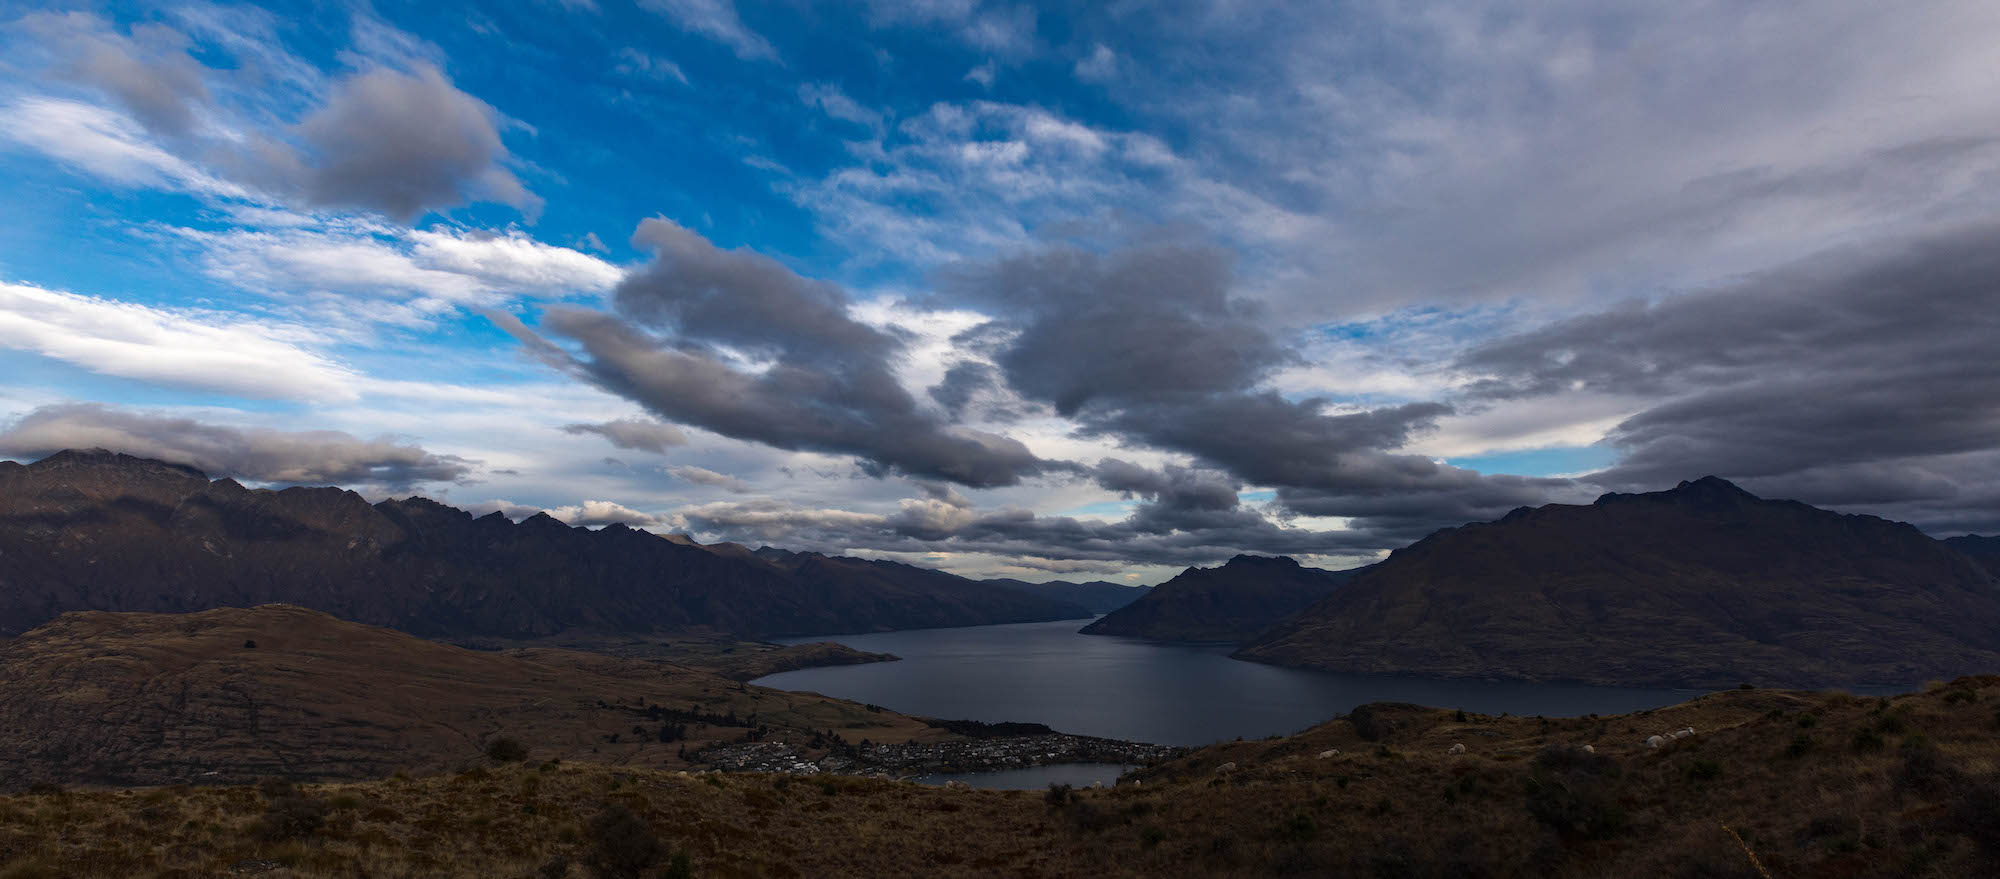
But before that, there is one more sunset (and sunrise). This time up Queenstown Hill we go. Not a big hike, and with decent views of the city and the lake.

flickr

MtRoy

NZ Photography Trip – Day 7

April 22nd, 2017

The town of Wanaka in beautiful autumn colours. How better to capture it then to go to the world famous Wanaka Tree. We thought that we are the most prepared photographers, we got there a good hour before the sunrise. When we got to the tree itself, we quickly realised that this was a very popular spot as there were about 20-30 people gathered around the tree with their tripods. Anton and I tried our best to get a good view of the tree, but we found it to be impossible.

We tried to get a few shots, but with not much luck, so we gave up and went off to search for an even better photo location. For that we didn’t have to go far, just a few meters away we found a pond with perfectly still water, which ended up being perfect for our ideas of taking photos of the reflections. On the way back, we noticed that most of the photographers have dispersed and so I took a few quick pics of the tree.

It was a rather lazy afternoon – we just had lunch, walked around Wanaka and then waited for the sunset.

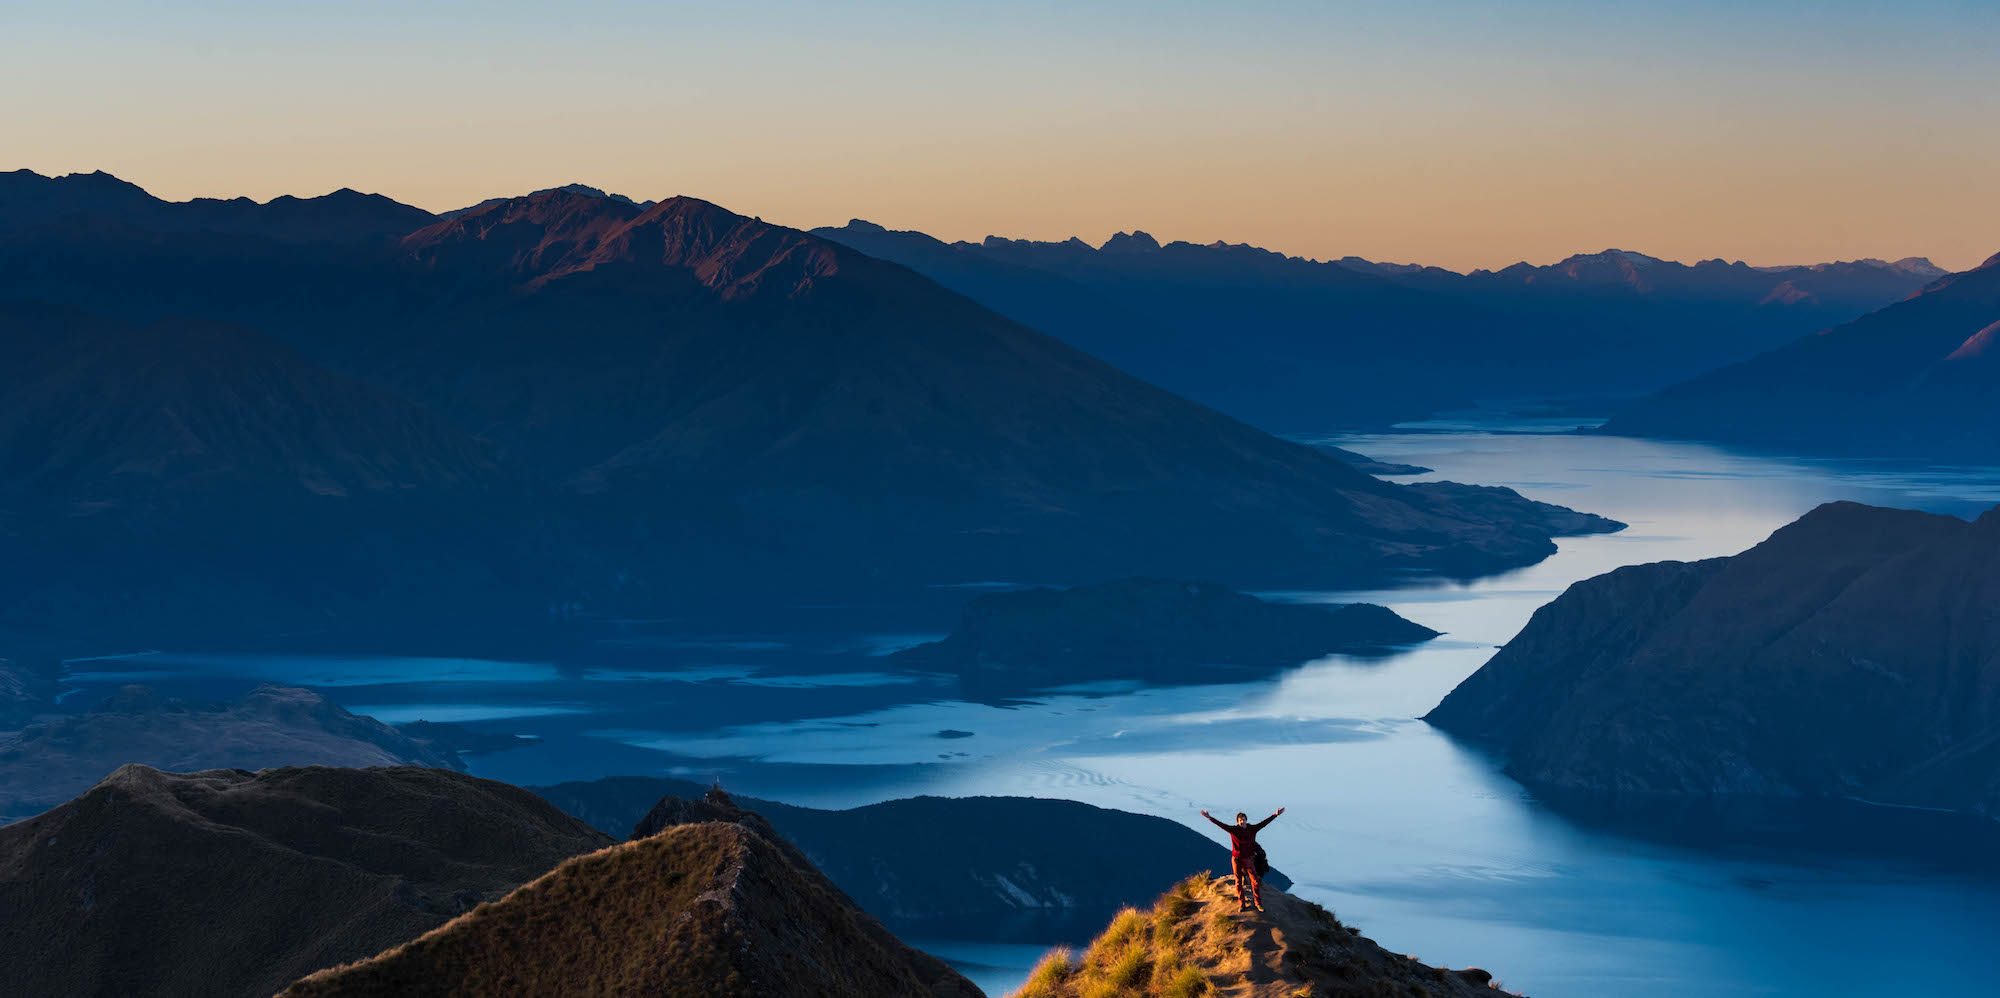
Then we set out to Roy’s Peak, but little did we know that the next hike would be our longest and hardest of the whole trip. The hike up Mt Roy takes about 3.5 hours one way and is a constant incline. It goes from 300m above sea level to 1.5km above sea level. It was tough, mainly due to the scorching heat and the heavy backpacks – all that camera gear + tripods + food + warm clothes. So after this long hike, we finally reached the top… or so we though. There are actually 2 peaks, and the peak of Mt. Roy was another 40 minute hike up from where we were. So after some consideration and looking at how low the sun has already set, we decided to just stop there, and take all the photos of the sunset from this mini peak.

As you will see, the photos from the evening turned out fantastic, with a gorgeous display of colours and the stunning landscapes.

flickr


Mt Cook Pukaki Lake

NZ Photography Trip – Day 6

April 21st, 2017

Our next destination is the lakeside town of Wanaka, so we set off for there. But first we had to take one final look at Mt. Cook, this time from the other end of lake Pukaki. We stumbled upon a Chinese photography tour group and decided to tag along and see what they are up to. They led us up to this hill, which had a stunning view of Mt Cook and all its surroundings. That morning was definitely worth the time to wake up early, drive for about 40 minutes and then take these great shots.

Then the 3 hour trip to Wanaka began. But not long after leaving the town of Twizle we found a lake with crystal clear water that reflected the autumn trees that surrounded the lake. We went from snowy cold mountains to beautiful yellow autumn colours in the span of 1 hour.

We arrived in Wanaka, went for lunch, did some shopping and then spent the evening hiking onto Rocky Mountain (near Diamond lake) hoping to still get a glimpse of the sun shining onto Lake Wanaka and the surrounding mountains. But alas, we did not make it in time. I still think I managed to get some decent shots of around the area.

The day and the night were much warmer then previous days, but not warm enough to comfortably sleep without any extra layers of clothes on.

flickr

Tasman Glacier

NZ Photography Trip – Day 5

April 20th, 2017

When we woke up this time, I didn’t feel cold, as I was wearing 4 layers of clothes while sleeping in my warm sleeping bag. But once we opened the tent, we quickly realised that it was around -2 as we could see the frost on the tent. Somehow our bodies have already gotten used to the early rises so waking up for the sunrise was not a challenge anymore.

The plan for today was to head over to Tasman Glacier (6km away) and hope to see the sunrise over the lake / glacier. Unfortunately we didn’t get the great views we were expecting, but we still made do with what we were presented.

The day went pretty much the same as the previous 2, with battery charging, eating and some driving around.

As we were completely drained from the sunset yesterday, when we had to go up 2200 steps, we decided to go for the same lookout at Tasman Glacier as it was simple and had potential.

As you can see, today was more of a break day, as the plan for tomorrow is Wanaka its Diamond lake and Rocky mountain.

flickr

MtCook

NZ Photography Trip – Day 4

April 19th, 2017

Just when I thought it couldn’t get any colder… 0° tonight. It’s 5am again, and we’re off for another sunrise photoshoot.

Rinse repeat with the battery charging – me sitting in the visitor centre waiting for everything to charge, while Anton is off taking photos somewhere. Some instant soups, apples and bananas later, its time for another hike!

Today to see the sunset we didn’t just hike a mountain. Oh no. We went up 2200 steps of Sealy Tarns Track to get a great view of the whole valley. It was tougher then expected. Hiking up a incline is one thing, but going up steps for 1.5 hours is a completely different beast. It reminded me of the tour du mont blanc, where you face steep climbs and challenging terrain, but this felt even more intense in such a short time.

The whole time we were going up – not a single cloud (at all, just clear blue skies; thats not that great for landscape photos). We finally reached the top of this track and we got a gorgeous view of both Mt Cook and the valley with the village.

Just when we thought that walking up was hard, going down was even worse. We could feel our legs shaking by the end of it, but we knew we had to keep going. It was pitch black and all we could see is the step beneath us thanks to our flashlights, and the stars above us. Oh the stars were absolutely amazing. We could clearly see the whole Milky Way every day, as no light pollution at all!

Once that was over, what awaited us was going to be the coldest night of our whole trip.

flickr