Queenstown Sunrise

NZ Photography Trip – Day 9

April 24th, 2017

Well, looks like this is the end, its time to go home. My flight back to Sydney was at midday, so you know what that means? I can go for another sunrise!

I don’t even know where we went this time, we just drove alongside the coast of the lake for about 20 minutes and then reached this lookout point. From there we had a great view of the lake, and the valley. Today was actually the first time when we had proper clouds during a sunrise. Both Anton and I were really happy that we managed to get some bright red colours on the clouds and mountains. Even if it only lasted a few minutes.

That’s all folks. I am now heading back to Sydney and getting back into my old routine of work, club, and chilling with friends. Time to edit all the photos I took. (Edit: ended up with exactly 100 photos from this trip, down from 1.2k)

flickr

Look at how much I walked during the past week! I think I beat all my records.

Queenstown Hill

NZ Photography Trip – Day 8

April 23rd, 2017

After that really long hike up and down Mt. John, Anton and I were definitely not up for another hike, especially at 6am in the morning. So we went around the lake, looking for some decent photo spots. Took a few shots here and there, went back to the tree…

Not much to say about that morning, aside for the fact that we had to frantically pack up as we had a long trip to Queenstown next!

On the way to Queenstown, we stopped in the Arrowtown. Its a small old style town by the side of the mountains and near a river. I really liked the architecture and the autumn colours, and I wish I took some photos, but it was very crowded. It was right in the middle of their autumn festival, so there were tons of people – both tourists and locals from around the area. We had some delicious lamb steaks and then continued our journey to Queenstown.

Even though Queenstown sounds like a small city, it was the biggest one we visited while on our trip (excluding Christchurch). The original plan was to camp about 10km out of town, however after a week of sleeping in a tent in the cold I had enough. I booked us a twin bed room in a backpackers and I don’t regret it one bit. We could finally take a warm shower, lie in a soft bed and I can pack up for my return flight!

But before that, there is one more sunset (and sunrise). This time up Queenstown Hill we go. Not a big hike, and with decent views of the city and the lake.

flickr

MtRoy

NZ Photography Trip – Day 7

April 22nd, 2017

The town of Wanaka in beautiful autumn colours. How better to capture it then to go to the world famous Wanaka Tree. We thought that we are the most prepared photographers, we got there a good hour before the sunrise. When we got to the tree itself, we quickly realised that this was a very popular spot as there were about 20-30 people gathered around the tree with their tripods. Anton and I tried our best to get a good view of the tree, but we found it to be impossible.

We tried to get a few shots, but with not much luck, so we gave up and went off to search for an even better photo location. For that we didn’t have to go far, just a few meters away we found a pond with perfectly still water, which ended up being perfect for our ideas of taking photos of the reflections. On the way back, we noticed that most of the photographers have dispersed and so I took a few quick pics of the tree.

It was a rather lazy afternoon – we just had lunch, walked around Wanaka and then waited for the sunset.

Then we set out to Roy’s Peak, but little did we know that the next hike would be our longest and hardest of the whole trip. The hike up Mt Roy takes about 3.5 hours one way and is a constant incline. It goes from 300m above sea level to 1.5km above sea level. It was tough, mainly due to the scorching heat and the heavy backpacks – all that camera gear + tripods + food + warm clothes. So after this long hike, we finally reached the top… or so we though. There are actually 2 peaks, and the peak of Mt. Roy was another 40 minute hike up from where we were. So after some consideration and looking at how low the sun has already set, we decided to just stop there, and take all the photos of the sunset from this mini peak.

As you will see, the photos from the evening turned out fantastic, with a gorgeous display of colours and the stunning landscapes.

flickr


Mt Cook Pukaki Lake

NZ Photography Trip – Day 6

April 21st, 2017

Our next destination is the lakeside town of Wanaka, so we set off for there. But first we had to take one final look at Mt. Cook, this time from the other end of lake Pukaki. We stumbled upon a Chinese photography tour group and decided to tag along and see what they are up to. They led us up to this hill, which had a stunning view of Mt Cook and all its surroundings. That morning was definitely worth the time to wake up early, drive for about 40 minutes and then take these great shots.

Then the 3 hour trip to Wanaka began. But not long after leaving the town of Twizle we found a lake with crystal clear water that reflected the autumn trees that surrounded the lake. We went from snowy cold mountains to beautiful yellow autumn colours in the span of 1 hour.

We arrived in Wanaka, went for lunch, did some shopping and then spent the evening hiking onto Rocky Mountain (near Diamond lake) hoping to still get a glimpse of the sun shining onto Lake Wanaka and the surrounding mountains. But alas, we did not make it in time. I still think I managed to get some decent shots of around the area.

The day and the night were much warmer then previous days, but not warm enough to comfortably sleep without any extra layers of clothes on.

flickr

Tasman Glacier

NZ Photography Trip – Day 5

April 20th, 2017

When we woke up this time, I didn’t feel cold, as I was wearing 4 layers of clothes while sleeping in my warm sleeping bag. But once we opened the tent, we quickly realised that it was around -2 as we could see the frost on the tent. Somehow our bodies have already gotten used to the early rises so waking up for the sunrise was not a challenge anymore.

The plan for today was to head over to Tasman Glacier (6km away) and hope to see the sunrise over the lake / glacier. Unfortunately we didn’t get the great views we were expecting, but we still made do with what we were presented.

The day went pretty much the same as the previous 2, with battery charging, eating and some driving around.

As we were completely drained from the sunset yesterday, when we had to go up 2200 steps, we decided to go for the same lookout at Tasman Glacier as it was simple and had potential.

As you can see, today was more of a break day, as the plan for tomorrow is Wanaka its Diamond lake and Rocky mountain.

flickr

Lake Tekapo

NZ Photography Trip – Day 2

April 17th, 2017

Early to bed, early to rise right? Well, it was 5am and we had to be ready to hike up a mountain. Mount John was our first target. Apparently the whole lake would have been visible from the top, if it wasn’t covered in clouds… We only got a small glimpse above the layer of clouds and fog, until it consumed us as well.

That was not the best morning, but shortly after coming down form MT. John the clouds cleared up and gave us some beautiful views of lake Tekapo. After brunch and some shopping we went on another photo hunt, this time with seasonal trees and beautiful mountains.

For the sunset we went up the same mountain, but this time, the sky was completely clear, and the valley was just breathtakingly beautiful. We welcomed the night on the top of Mt John and then got some great shots of the milky way above it.

At that point I realised that my battery was dying on me and that this might prove a problem for the whole trip. A full charges takes about 2 hours, and I couldn’t just leave it overnight in the communal kitchen of our camp. That was a rather long evening of sitting there, charging my batteries and playing Pokemon Moon on my 3DS.

flickr

New Zealand Photography Trip – Day 1

April 16th, 2017

I recently got myself a new Camera – Canon 5D Mark IV. So of course I need to test it out by taking photos of the most beautiful landscapes in the world – New Zealand.

My colleague – Anton and I embarked on a journey to the land of Middle Earth, with one goal in mind: “take as many beautiful landscapes as possible”.

NZ 2017 Day 1 – 16th April:

We flew from Sydney to Christchurch on an Emirates Airbus A380, like you normally would, and enjoyed the great entertainment that was provided to us onboard. Upon arrival we instantly encountered our first issue – getting held up by quarantine. We were carrying a tent, so to remove all possible remnants of soil, quarantine had to inspect and vacuum it. After a small delay and a quick lunch, we collected our rental car and drove about 270km to Lake Tekapo. Arriving at around 10pm, our next struggle was to set up our tent. That proved a bit more difficult than initially expected. Mainly because it was 4 degrees outside, a bit windy, and we couldn’t figure out how to assemble the thing. Eventually we got it done and I spent my first night in a tent. Oh we also took some night shots of the church!

Tekapo Church

flickr

Clovelly Milky Way

Milky Way Photography

May 7th, 2016

Night photography is something that I have always wanted to learn to do well, but have failed over and over again. In the past, I wouldn’t have a tripod, so taking good night shots was near impossible. Then I had the technology, but lacked the skills. Now I have finally started learning how to take photos of the stars and what details to bring out in a photo, if I want to see beyond the horizon. ‘

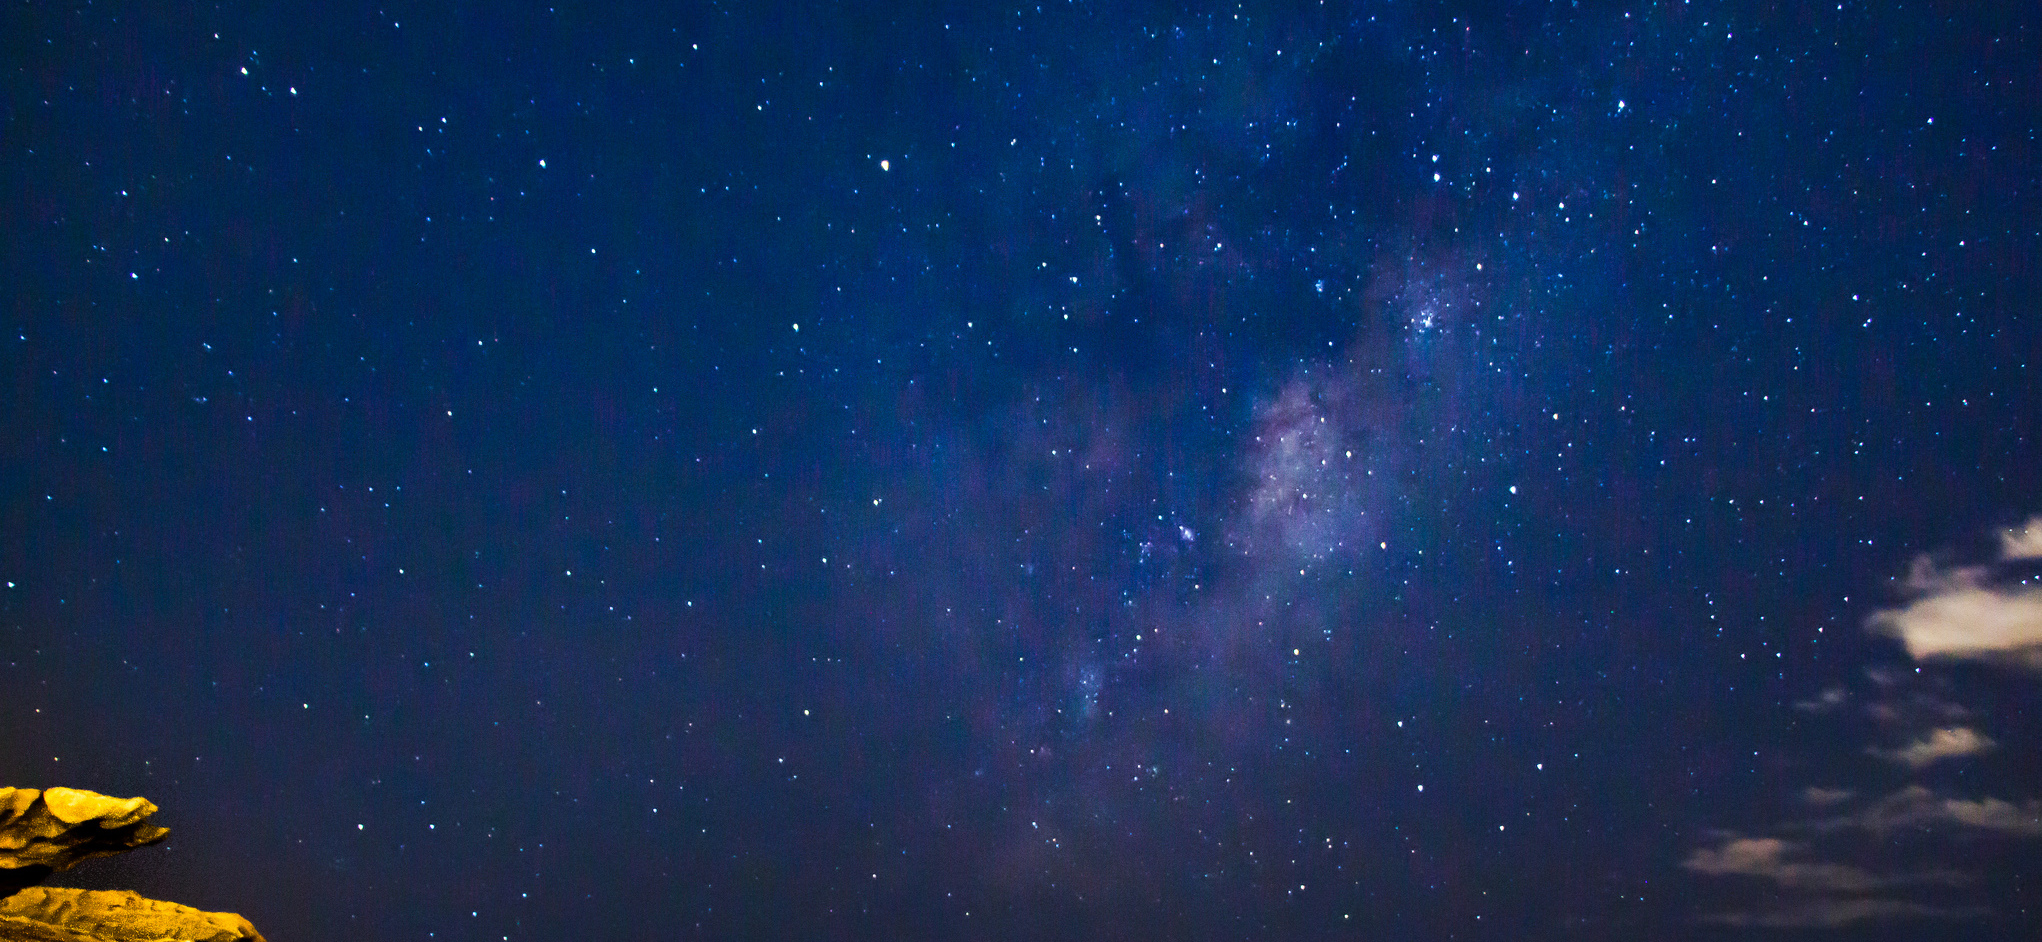
Once again my coworker and mentor Anton, invited me to take some photos with him. This time though the goal was to get a perfect shot of the Milky Way. We set up at the cliffs near Clovelly Beach and started experimenting with various angles, exposure and ISO settings. After a few hours and about 50 photos later, we had enough to make something gorgeous.

Once a photo is taken, it does not mean its final, taking the photo is just half the work. When shooting in RAW, the camera doesn’t automatically post-process the photos, it leaves as much data about the shot as possible and leave the processing to us – the photographers. Thats why our job to edit these shots with software like Lightroom or Photoshop. We have all the controls: exposure, white balance, contrast, etc… and it is our job to make sure to bring out the best of the photo, without making it too unrealistic.

Well since this was my first time editing a shot of the night sky and the Milky Way, I had to seek some help online. I found some great tutorials and videos explaining the process of editing night shots, and the example I ended up following, is this one. If you are planning to take some night shots, then I would highly recommend you watch some guides, and listen to advice form professionals.

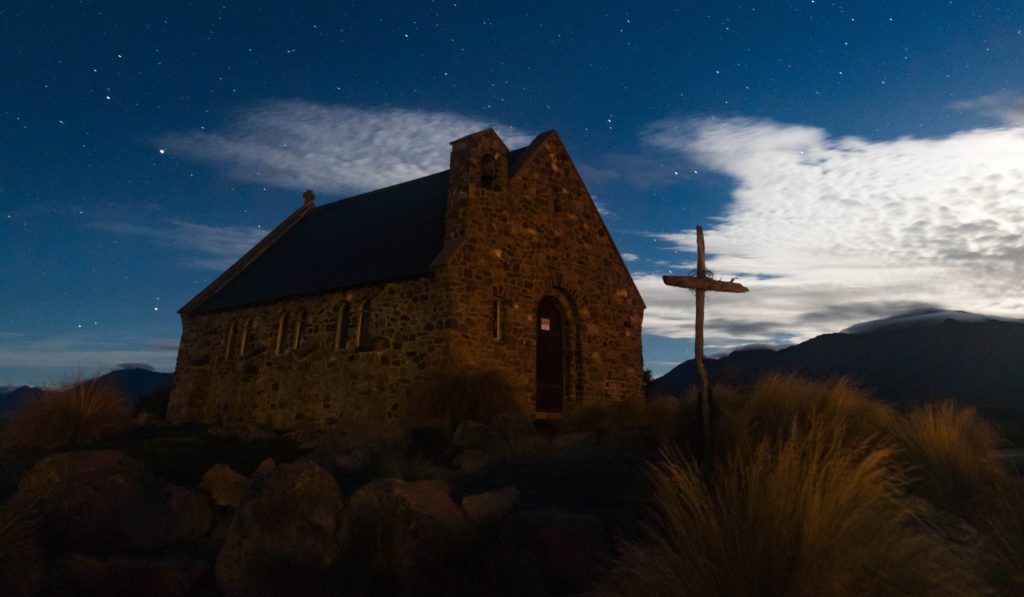
But, even though I followed the tutorials for editing my photos, some still came out grainy and hazy. I can not do much about that, as I actually did mess up the ISO and exposure settings a bit when taking these photos, as I did not adhere to the 500 rule.

As always, my photos are available on my –

flickr_logo